Betsie Bop

Handlettering – My favorite New Hobby

July 9, 2019 by Betsiebop

Creating with pen and paper has to be one of my favorite things to do. My Mom has many treasures from over the years.

I just can’t get over my love of real paper and pens.

I’ve always loved buying a new pen. Anything that looks cool or writes nifty has long sucked me into buying it. Over the years  people have given us  a small Wal-Mart supply of school pens and pencils.

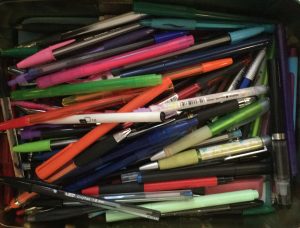
My pen stash…I need a few more, right?

I’ve told myself that I wouldn’t buy another pen until that stash was gone.

I’ve been diligently using up those pens…..but I haven’t stuck to that “I won’t buy another pen” idea very well.

I’m not sure any pen can outlast a basic BIC pen. They remind me of the Energizer Bunny…they keep going and going and going.

I’ve put colorful tape on mine so I will hopefully use it up before I lose it. I know that may sound a tad neurotic, but I love the feeling of using a pen to the last drop.

I’ve found that when you want to use a BIC pen to the last drop you are in for quite the commitment. Those pens really do last forever, which should be a  testament to the pen, itself. I doodle and draw and scribble and write and they just. keep. going.

I want to use my pen collection all up, so that I won’t feel bad buying a new one. As much as I applaud BIC for their never ending ink…it’s not a super cute pen.

I like basic black or blue ink for most of what I do, but does the pen, itself have to be boring? I know the quality of pen doesn’t change based on the outside appearance…but I just love bright and pretty things.

My dear husband was daring enough to let me join him on his office supply store visit a couple weeks ago. Taking me can be rather adventurous as I can rarely get out of there without a pen or a box of tea. Why do they sell tea there? I have no idea.

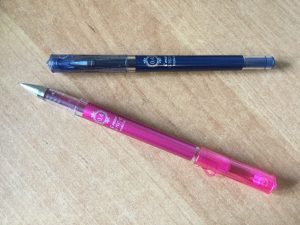
My new pens from the office supply store.

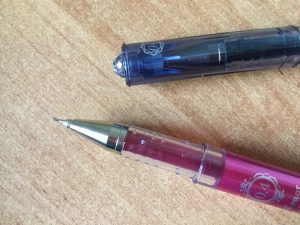
Look at what a fine tip this has! 0.4 is awesome. I love it.

A few years back I watched a YouTube video about  Master Penman. The guy is amazing to see. It inspired me to try learning more about calligraphy….but as is the nature with my less-than-perfectionist self…I didn’t get that far.

In that process, I learned about brush pens and hand lettering. It’s not hard to be consistent when you’ve found something you really love.

I bought a couple books and read tons of blog posts. I find neat ideas and then try to replicate it. I’ve found composing my own work is challenging. Getting everything sized correctly and balanced is harder than it looks.

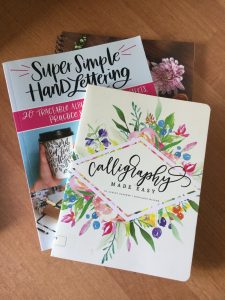
Some great Hand Lettering books. They’ve taught me a lot.

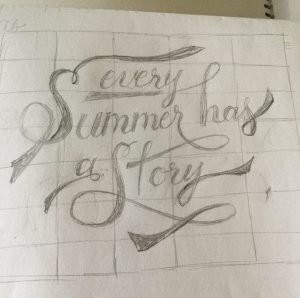
Trying to work out my own lay out and lettering formation. Its kind of hard.

So this is part of my journey…just learning more and having fun with it. I can endlessly work on hand-lettering. It takes me a long time to make anything that looks remotely decent. With each new project it is fun to see improvement.

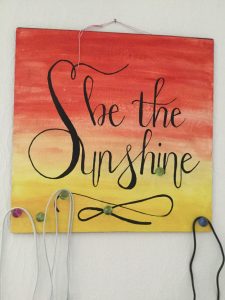
My first piece I worked on. It’s a magnetic board that I hang my cords on. It’s pretty handy!

It’s easy to see how far I’ve come…(with a long ways to go, yet)…when I look at the first things I ever did.

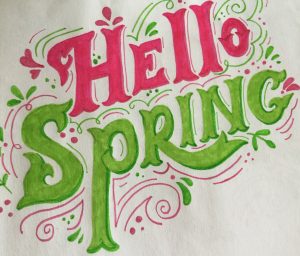
One of my more recent pieces.

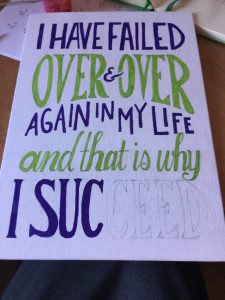
Sorry the picture is a little gray. This was one of my first attempts to work on canvas. I had it setting on my desk unfinished when my husband saw it and starting laughing. He said maybe I should just leave it like this…..Yeah…read it again. My kids laughed with us too. They teased me about it for days.


I think the best website I have seen so far with exceptional freebie helps is here, Lettering Daily. They have stuff that is just awesome and will really take you to the next level in hand-lettering. You should definitely check it out.


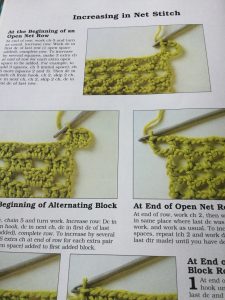
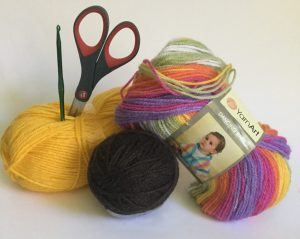
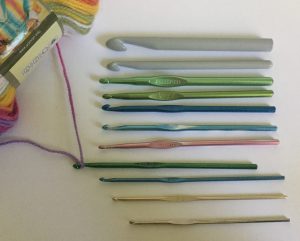
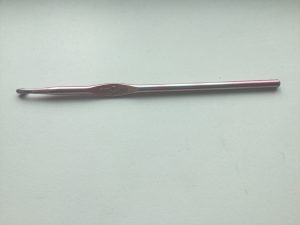
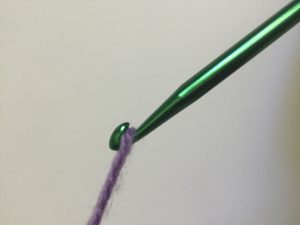
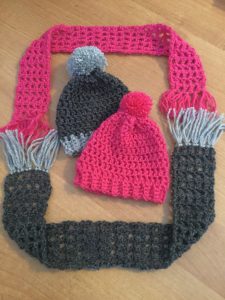
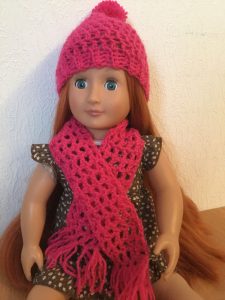
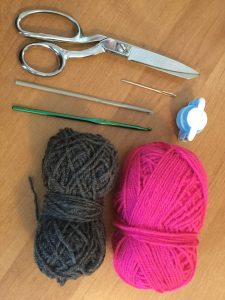
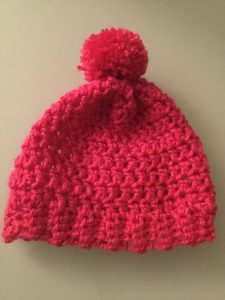
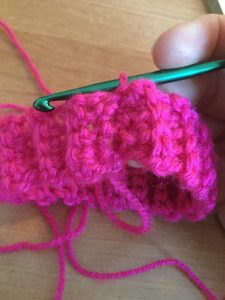
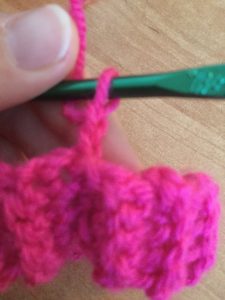
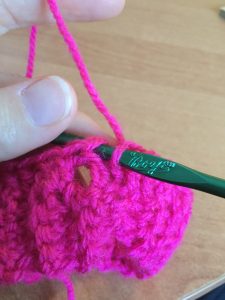
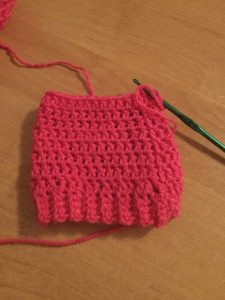
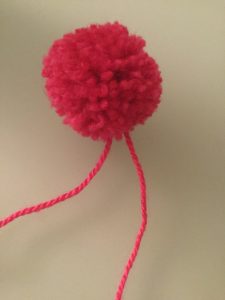
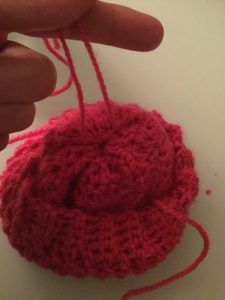
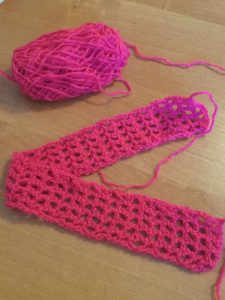
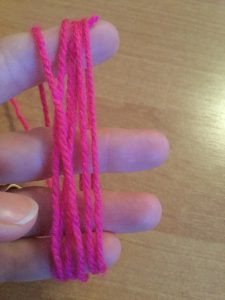
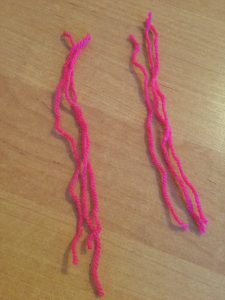
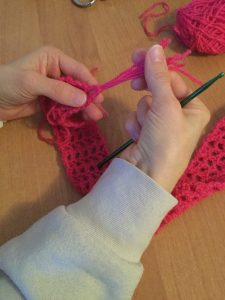
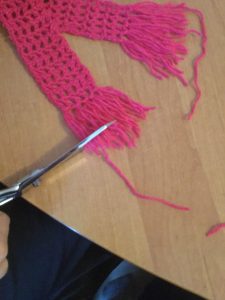
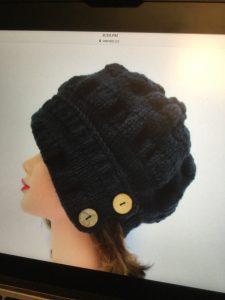
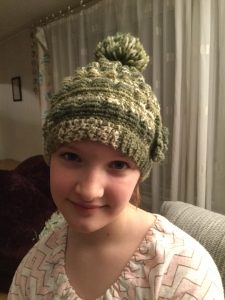
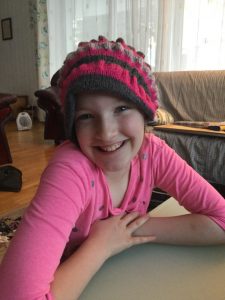
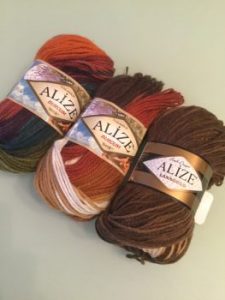
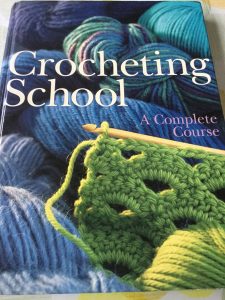
If you are a crazy crafter like me and have ever wanted to learn how to crochet, check out this page.

Filed Under: DIY, hand lettering Tagged With: hand lettering

How To Make Chicken Broth

June 13, 2019 by Betsiebop

All About Chicken Stock and Broth

Chicken broth is one of those things that just tastes amazing. But how do you make it at home? Well actually, it’s pretty simple. I think it takes more time than skill in my opinion.

I know some recipes call for bone broth and some for stock. So what is the difference between bone broth and stock?

What is the Difference between Broth and Stock?

Some people say they are essentially the same and others say they have critical differences. So which is it?

I probably won’t solve that world dilemma today. There will always be experts in the field debating it or letting you know what it really is, but for today I will give you what I found from my research on the matter.

I’m sure there will be some who even disagree with these explanations. I guess that is the nature of the beast.

Small disclaimer, I’ve never been to a culinary school in my life. I’m just a home cook that learned from my Mom and life experiences. So at the end of this I will give you my recipe for my Chicken Broth….or at least what I call Chicken Broth!

What is Broth?

Broth is when you cook meat sometimes with bones and aromatics (think onions or garlic), herbs and/or a few vegetables. This cooks for a shorter time like one to two hours. Technically, you don’t even have to add bones for it to be broth.

The end product will not be thick or gelatinous. Basically, you won’t ever confuse this for jell-o in your fridge.

What is Stock?

Stock is made from cooking bones in water. It is cooked for 6-8 hours to release the collagen out of the bones. You can actually cook it for even longer than this. I’ve done it over two days many times and it is very rich and good tasting.

Some people recommend roasting your bones in the oven before cooking them on the stove-top in a pot of water.

The end result of cooking stock is a product that should be thick and gelatinous when it is cooled. Think Jell-O consistency.

What Do I Make?

Based on these definitions, what I make must be a crossover between the two. I’ve come up with what works best for me time-wise and flavor-wise.

I use meat and bones, but I also cook it for very looooong time. I don’t usually add anything else either.

Occasionaly I have added celery, onions, garlic, ginger, pepper, and/or carrots, but that’s just if I have extra stuff hanging around and am in the mood for something different.

It’s fine if you do. I’ve found that I like the flavor the best with just meat and bones. I like the flavor of the chicken to shine through and not be over-powered by all that other stuff.

I do pull the meat off of the bones after about an hour and then put the bones, skin, etc all back into the pot. I think having the meat cooked with it for even a short amount of time really adds a ton to the overall end flavor.

I use a meat thermometer like this one to check to see if the meat is done.

I pull the chicken out to de-bone when it reaches at least 165 F  in the thickest portion of the meat. I stab it a few places just to make sure. I know. I’m a bit neurotic about this. But I want to be very sure that the chicken meat is thoroughly cooked.

I think for the average home cook it is safe to say that you can use stock or broth interchangeably in your recipes with good success.

What Bones do I use for making Broth or Stock?

Because, I live in Estonia and have limited access to beef bones, I primarily just make chicken broth. I’ve used chicken necks to make broth. I can buy a bunch of them frozen in packs. It tastes good. There are a lot of little bones, so at the end you want to strain it out really well.

We’ve also used chicken feet, but I think that one is better if you just add a couple to a pot of other bones. It really does add a lot of thickness to the end product, but when I tried it as just a bunch of chicken feet, the taste was not that great. My kids did not like that one at all.

I can’t find them easily, so it’s not something I use frequently. But I would throw in a couple with every pot if I found a way to get them locally.

Most of the time, I use whole chicken fryers. I cut the breast off to use in a chicken stir-fry or for making home-made chicken tenders. My kids just love the chicken tenders. Those always disappear off of the plate way to fast.

Once the breast are removed, I put the whole chicken in the large pot and cover it with water.  Our chickens here tend to run on the small size so I do two at the same time.

I’ve tried Pork Broth. I used joint bones. It’s really not my favorite broth at all. I guess there is a reason no one really talks about pork broth. While I am sure you can make it work. I’ve never tried it again as I didn’t think it was that great and wasn’t really worth my time.

Beef broth is amazing and I am bummed that beef bones are so hard to come by here. You want to look for bones that contain joints, like knuckles, short ribs or neck bones. The joints are where most of the cartilage is located and that is what makes broth have that amazing thick texture.

Benefits of Bone Broth

Bone broth contains essential amino acids and minerals such as phosphorus, magnesium, calcium, and potassium. It contains collagen with is said to be great for your joints, hair, skin, and nails.

You can’t say for any certainty what exactly is in your home-made broth since there are so many variables: diet of the animal, which bones are used, and how long it was cooked.

We can all agree it is loaded with good stuff for you though. Using broth won’t cure all that ails you, but it does taste good and is a great base for soups, sauces, or even just to drink on its own.

Do you Refrigerate Broth?

I put my broth in a canning jar while it is still hot and put a lid on it. It will seal, but don’t think….pressure cooking type of seal. You must still keep it in the fridge. I use mine within a week or else I break the seal and put it in the freezer.

(I break the seal to allow for expansion in the freezer. Also you want to make sure that if you are freezing liquid in a glass jar that you leave a bit of head space. I leave at least an inch. I learned the hard way that you can break your glass jars in the freezer if you don’t leave that extra room for the liquid to expand. It was a frustrating moment to see all my hard work go right into the trash. On the bright side, it was a lesson I won’t ever forget!)

Does Broth go Bad?

The short answer is….Absolutely! But how do you know if it’s gone bad? I look for the color to have changed to a kind of gray hue. Take notice of what it looks like fresh so you will know what a change actually looks like.

I also smell it. If it smells like anything other than chicken broth….it’s time to pitch it. When it doubt throw it out!

Making the Broth

What you need:

2 whole chickens

large cooking pot with lid (mine is 7 quarts)

water

sharp knife and cutting board

Directions:

1.  Cut the breast off of your chickens and set those aside either in your fridge to use within a day or two or in your freezer for storage.

2.  Place the chickens in your pot. Then cover them with water or add water up to within two inches of the brim of my pot. You might need to vary a little bit based on the size of your pot and the size of your chickens.

I like the water to cover the chickens, but if for some reason the chickens are bigger then I don’t cover them completely. If the water level is too high then the pot will boil over very easily. And who wants to clean up that mess? I try to avoid that.

And that is all I put in the pot at this point. Notice no salt is added at this point.

The reason is that as the bones cook they will release some of it’s own and it can taste a little bit salty…so it’s best to wait until the end to taste test it and see how much you really need to add.

3. Turn the pot on high to bring it to a boil.Once it boils, turn it down to low heat and let it cook for about 45 minutes-to 1 hour to cook the meat.

  • Watch the pot carefully as it comes to a boiling point. Depending on how much water you put in the pot, it can boil over the pan. I hate it when that happens.
  • When I can tell it is about ready to boil I often just prop the lid a little off of the pan to let some heat escape to prevent it from boiling over.
  • I have tried different ways of doing this. If I don’t put water over the entire chicken that leg that is sticking up takes forever to cook. By the time that leg gets cooked the rest will be mush. So I try to re-position them so it all fits in nicely and can be covered with water. Occasionally, that just doesn’t work and I deal with it!

4. Use a kitchen thermometer to test for when the meat is done. I’m a bit neurotic about poultry being cooked all the way through. I want it to be a solid 165 F before I pull it out.

That is my safe number. I realize it can be lower than that and still be done, but that is where I am happy.

5. When the chicken is done, use a large slotted spoons to lift out both chickens onto a platter, bowl or plate. Whatever you have that will hold that much chicken is fine to use. Just make sure that it is a clean dish!

6. Let it cool for a little bit and then de-bone the chicken. I keep the meat and throw that in the fridge.

It is perfect for mixing with BBQ sauce and making sandwiches with later. You can add taco seasoning for chicken tacos. Use it in enchiladas, or even make chicken salad sandwiches. You are limited only to your imagination. It’s handy stuff to have around. It has many uses.

Yes, it is boiled meat. I get that. It’s not really ultra-amazing on its own, but it is handy to make other meals with. My husband is a definite meat-eater and sometimes he just eats it plain as a snack.

De-boning Chicken

As I de-bone the chicken, I have one bowl sitting to the right of the plate of chicken and the pot of “broth” sitting to the left of the plate on a pot holder. I throw the meat in the bowl and everything else goes right back into the pot…bones, skin, odd bits of whatever is in that chicken.

I’ll just state up front that some of the stuff you see when you de-bone a chicken is kind of nasty, but it’s fine to just throw everything but the meat back in the pot.

I think at this point some people would recommenced roasting the bones for at least 30-45 minutes in the oven. I’ve heard it really adds great flavor to the finished product. As of now, I’ve not ever taken the time to do that. Because….I don’t want to add even more time to my process…but maybe one day, I’ll get around to trying it.

Back to the broth….

I’ve tested the flavor of cooking the bones with veggies added to the mix compared to only chicken. I think adding vegetables really makes it taste more like vegetable broth and you lose that distinct chicken broth flavor we all know. So most of the time, it’s just bones for me.

I cook the broth again for several hours. There’s not really a right or wrong way here. If you only have 2 more hours to do, then stop at two hours.

But if you started early in the morning and are home all day, then let it keep cooking all day on low. If you use a crock pot and want to do it all night too. You can. The longer you cook it, the more good stuff comes out of the bones.

Sometimes, I add about a tablespoon of apple cider vinegar to the bone broth after I’ve removed the meat to help break down the bones. That may sound gross, but you really don’t taste that in the end and it really does work.

I don’t add salt as the broth becomes naturally salty over the long cooking period. And once you add salt you can’t take that out. Not to state the obvious or anything. So I salt it to taste when I use it.

Why start with a Whole Broiler?

The reason why I start with whole broilers and then de-bone them is because I have tried making broth without meat and it just didn’t taste very good. It seems simple enough to find whole broilers and just throw the whole thing in and go from there.

My bonus is that I have teenagers in the house and I’ve taught them how to cut the breasts off of the chicken plus how to clean up the raw chicken mess along with how to de-bone them. So I get help from time to time.

It’s the bonus of having big kids around!

So I guess this is why my version is kind of a cross-over between stock and broth. I use meat, but I also cook it for a very long time without adding any extras to it most of the time.

Occasionally, I have some scraps and will throw in a bit of garlic or even some ginger that is drying up and is on its way out or other little things, but usually I just leave it plain.

When I am done. I use a slotted spoon and pull out the bones and trash them. Then I pour it into glass canning jars. You can put it through a fine mesh strainer to get all the little bits of stuff out if you want really smooth broth.

I don’t do it as I don’t really care. When I use it in soups and sauces it doesn’t really matter to me most of the time if there are few chicken floaties hanging around.

It all sinks to the bottom, so if I am just drinking it plain…I just don’t usually drink the last drink which might be more appropriately called a bite. LOL

Fat. There is always a good bit of fat to deal with in the finished batch of broth. You can use a ladle and try to skim it off when it is warm. I personally just throw it all in the jar together and store it that way.

I store my broth in the fridge and typically use within a week. After it is chilled the fat solidifies pretty good and it is easy to just scoop it out and do whatever you want to with it.

Now you have broth that is ready to use for whatever you want. If you cooked yours for a long time, it will be pretty thick when it is chilled. Some batches vary for me.

Sometimes they are like Jell-O jigglers and other times it is more like jelly, but it always thickens up at least a little.

I hope this helps you tackle making broth or stock for your first time.

It is a really wonderful thing to have on hand to cook with. It tastes so much better than store-bought stuff. I was appalled the last time I used canned broth from the store at how different it tastes from stuff you can make yourself.

You can so do this! It won’t save the world or heal all your problems, but you might feel like a super-hero the first time you do it. It’s pretty stinkin’ awesome to hold that jar of broth in your hands and think that you made it yourself.

You can do it!

Filed Under: kitchen, recipes

Make a Summer Schedule for Kids

May 28, 2019 by Betsiebop

School is out for summer. Yay!

The kids are loving it. I’m loving it. But now I get the challenge of the kids having more free time, but I don’t want them to squander all their time either. I’m a big fan of being productive.

We have lots of fun too, but we have things that do need to be done and skills I want them to work on, so summer is not ALL play.

Now, I know I can’t schedule their life down to a “t” and dictate it all, but I do want to encourage them to make good habits and to help with things around the house.

I don’t want the responsibility of being an adult to shock them. I want them prepared for what that looks like as much as I can.

There are no shortage of things that need to be done around our house. I think it is good to be able to pass on real life skills to my kids and to include them in what it takes to make a house full of people really work.

Some things need to be done daily. I am a serious check-list type of person. I love check-lists and use them daily for about everything. I have even gone so far as to write in what I’ve already done….just to check it off and track that I did it. That’s totally normal, right?

My kids have lessons and other things that continue through the summer outside of our house. This is not a list for those types of things. This is a list strictly for things that I want done at home.

I thought that I would share what mine looks like and how I made it. If anything helps you…then feel free to borrow the idea.

our summer check list

I know there are tons of things out there you can buy already made. Frankly, I’m a bit on the cheap side so I make my own.

I’m sure there are no shortage of apps that could do something like this for you too. But…..

I’m a bit old school. I love pen and paper. I have a bit of a love/hate relationship with technology. It makes some things so nice. But to me, nothing beats a piece of paper tacked on the board in the kitchen with a good old fashioned pen to cross things off.

Pens don’t have batteries that need recharged….and my kids never “borrow” my paper on the board for a million other purposes like they do my IPod.

Basically, I can count on my sheet of paper always being there and always being easy to see and use. And we have about two million pens in our house, so losing one of those is a non-issue. I’d actually be happy to get rid of a few.

While you can type up your lists on your computer….I just use paper and pen….back to that part about being in love with pens and paper…..

First, I decided what days I wanted to keep track of. Then I decided what I wanted to track. I have four kids spanning 4-15 years old. Obviously, I have vastly different expectations for my kids.

Then I just pulled out a piece of copy paper, pen, and a ruler and divided it up. I made a column for each kid. On each day, I write the recurring things I want them to do.

I also added extra check boxes for future daily things to add in. Since some things only need done once. This allows me to easily see each day what each kid needs to get done.

Once it is drawn up, I just scan it to my computer and then print out a copy for each week. As much as I love doodling, I don’t really want to make a new list each week. The point was to do it once and maximize my time for the rest of the summer.

I started doing this because my son highly prefers to know what is expected of him for the day. So I was already doing something like this for him….I just had to do it all the time. I’ve gone through a lot of Post-It notes!

I think he got my list making gene. Except, he doesn’t really make them per se, just likes having one when it comes to work. We just feel better knowing what we are doing.

I guess it always makes the day a bit smoother if the expectations are laid out clearly.

We rotate through house chores monthly so I didn’t write in the specifics as they already know what those are. I just want to know that they do, indeed, get done.

I know four kids isn’t that big of a family, but I find that if I don’t write stuff down I am always asking the kids if they did a particular job or not, over and over and over again.

They’d get frustrated with me…..I’d forget who I asked what and who answered what. Keeping a list or chart eliminates a lot of stress and keeps things pretty clear.

Don’t get me wrong. It’s not like my kids are jumping up and down for joy because they need to do things. Some days, list or not, they still don’t really want to do that “one” particular thing.

Overall, it makes life simpler and we have a lot less stress over getting things done.

The bonus is our house stays fairly clean. Not perfect. It’s a kid-lived in place and we love life and do things. I think we’ve found a nice balance though. It doesn’t happen by accident. You have to plan for it and teach kids to help out.

Filed Under: Home, Organization Tagged With: Home, kids, Organization

Corner To Corner Crochet

May 27, 2019 by Betsiebop

There are so many patterns of stitches to choose from when crocheting a new project. It can almost be hard to settle on one that you want to use.

I am definitely guilty of sorting through online images of crocheted baby blankets just to get ideas.

If I’m not careful, I can spend more time looking than actually doing. I guess that is the trap of the digital age.

It can so easily suck me in and there goes an hour or two of my life that I’ll never get back. It’s a true love/hate relationship.

I would have to say my most favorite thing to crochet is blankets. I’ve done more baby blankets than anything else.

I’m a sucker for babies in general and baby blankets have got to be a high second to that. Plus, they are smaller and you can actually complete them before eternity starts.

I love to start projects and to learn new patterns, but about halfway through, I struggle with being bored with the repetition of it all. Then I start to lose my enjoyment of the craft.

I still finish most of my projects. Some were just bad ideas to begin with and don’t deserve ever being finished. At least that is what I tell myself. Sounds good, right?

Maybe I should start four or five completely different patterns simultaneously and just rotate through what I work on. Maybe that would cure my problem? LOL

Anyhow, I’ve made a couple blankets with the corner to corner stitch and have fallen in love with it. It is pretty easy to do once you get the hang of it. It turns out beautiful every time and allows for room to play with colors and patterns.

This is my most recent corner to corner blanket that I crocheted. I made it for my Mother-In-Law. After all these years, I finally made her a blanket. (She’s a wonderful MIL, by the way)

There are great YouTube videos that describe how to crochet Corner to Corner far better than I can describe it here.

So here is a good link to check out. I like this particular video, because you can actually see the stitches as the lady crochets them. It is very clear. The lighting is good and she does a great job explaining the crochet pattern step by step.

You really just need to know how to make a slip knot, chain stitch and double crochet stitch. With these basic skills you can make this type of blanket. Just go slow.

The best advice I’ve ever heard from someone has been to simply do the first step of the pattern. Don’t even worry about reading the whole pattern or watching the whole video…as the case may be. It can be overwhelming. Just go bit by bit and you will figure it out as you go. I think it’s actually a fairly easy and relaxing pattern to crochet.

Tips for the process.

Work in your yarn tails while you crochet. I have found that if I leave them all to the end, it is a pain. If you change colors frequently you end up with a ton of tails to weave in and it can fee overwhelming.

It is a nice feeling to see the work you have done, just be done and not to have those little strings all over the place reminding you that you really aren’t done with that part at all.

Don’t stress about the size. I just go until I am happy with the width. I don’t even really measure it to be honest. I just work upward until the upper corner feels like it will be a good height for the width.

I do fold it over across  from itself from corner to corner to make sure that I go past the square shape and keep going until I have a good rectangular shape….at that point I start decreasing to finish the blanket off.

That is always a good point to get to on your blanket.  Each row gets shorter and shorter, and faster and faster to do.

This is always a great feeling. The point when you realize another accomplishment is nearly under your belt!

Choosing your colors is important and can mean the difference between a blanket that really “pops” or one that is just kind of “blah”.

I look online for ideas of what other people have done and works.

You could use a color wheel to get ideas of colors that go well together.

I’ve done a few projects that didn’t turn out at all like I’d hoped and it really came down to the colors I used. Which stinks.

Buying your yarn is pretty simple and the least amount of time that will go into crocheting a blanket. So put a little thought into those colors. You will be glad you did, when you see the finished project.

Corner to Corner crocheting is a great and a fairly easy pattern to try. It has limitless variations with colors and even some people make graphics with this technique that are pretty amazing.

If you’ve never tried corner to corner crocheting you should try it at least once in your life. It’s fun and makes for a beautiful pattern.

You can use if for so many more things than just a blanket. You are limited only by your imagination….washcloths, pillows, bags, curtains, etc

If you’re new to crochet here is a good post to get you started.

If you want a simple project to begin with this hat and scarf pattern for 18″ dolls (think American Girl) is a great place to start.


Filed Under: Crochet Tagged With: Corner to corner crochet, crochet, learn crochet

What Do You Need To Start Crocheting – Crochet Basics

May 21, 2019 by Betsiebop

What Do You Need To Start Crocheting?

I learned to crochet from my mom back when I was just a little girl. I must have chained thousands of stitches over and over. It was such great practice and  hooked me on this handicraft. (no pun intended)

If you are starting this journey all by yourself there are a few basic things to know that will help you out quite a bit. My mom just gave me a hook, scissors, and yarn. And that is all I ever used for years. And that is all that you really need.

Yarn, scissors,and a crochet hook is all you need to start crocheting.


I’ve added a darning needle (I use it to weave in the ends) to the mix now, but you can get away without it.

Darning needles work great to weave in those ends. I like to leave a little bit of yarn in mine when I am not using it to help me keep track of it…aka…not lose it!

Crochet Hook Sizes

Crochet hooks come in many sizes and the sizes are labeled differently in different areas of the world. There are 3 guages that I am aware of: letters, numbers, and metric. They all basically contain the same sizes, but are just labeled differently.

Crochet hooks come in a variety of sizes.

Here is a good guide to see the differences visually. ( crochet hook guide)

Crochet Stitches

Crochet stitches have names which can change based on which region of the world they are coming from. American and British use different terms for some of the same stitches. To read a pattern you will need to learn a few basic abbreviations.

When you see the whole list it can be overwhelming, but you won’t use most of them to start out with. So don’t let that hold you back from getting started.

Here is a good guide to see those differences. ( crochet abbreviations )

What Size of Crochet Hook Should I Use?

I think if you are starting it is easiest to just pick up a size G hook. There are tons of sizes, but really you don’t need them all to begin with. This is an easy size to start with and works well with most of the cheap yarn out there.

If you get too small of a hook, you’ll need to get thinner yarn and it’s just a tad harder to learn with. The same is true on the fatter hooks. You would need really thick yarn, which usually costs a bit more and I think is a little trickier for starting. But everyone is different.

The G crochet hook is the one pulled out with the yarn to the left.

I’ve come to believe that in crocheting there aren’t a lot of wrong ways or right ways to do things per se….it’s more of what works for you. Play around with it.

G crochet hook

What Size of Crochet Hook Should You With Your Yarn?

The easiest way to get yarn that is a good  match for your crochet hook is to just look on the yarn label itself. Most yarn labels will have a little spot on the back that gives the crochet hook  sizes and even knitting needle sizes that are recommended for that particular yarn. So just look for a yarn that recommends a G hook.

This label shows you the basic information about the yarn including what is the recommended size of crochet hook and knitting needles to use.


Here is another yarn label from a different brand. Again showing the same type of information.

Once you have the hook and yarn, you need scissors.. We all have a pair somewhere in the house. Whether or not you can find them, might be the better question, if your house is at all like mine. My kids are forever running off….not literally, thank goodness…..with my scissors and tape.

This is how the yarn should fit in the hook. Notice how it is fit snug in the crochet hook, but not super thin compared to the crochet hook either. This a G hook with yarn that calls for a G sized hook!

Crochet For Beginners

The basics of beginning to stitch include: how to hold the yarn in your left hand, how to hold your hook in your right hand, and the series of looping yarn over the hook and pulling through.


The very first thing you’ll need to learn is the slip knot. This creates the beginning loop you will crochet with. Here is a great video to walk you through learning that step.

There is an endless supply of YouTube videos on how to do this. Just pick one and practice that method. There are different ways to hold your yarn and even how to hold the hook.

This here is a great video that shows both how to hold your yarn in your right hand and also how to do a chain stitch….which is the most basic crochet stitch you need to learn first.

No matter which way you choose to learn, it will take a little bit of time to get comfortable with it. Don’t give up at first because it doesn’t feel natural. You can so learn this! Just practice making chains and then work your way upward adding on to those stitches.

Now to Crochet Your First Project

Good projects to begin once you get the hang of it are: pots holders, washcloths, or even a small baby blanket. Like any new skill, you just have to put time and effort into in and soon you will be enjoying the fruit of your labor. It’s pretty awesome to look at a completed blanket and know you that you created it all by hand….all by yourself.

If you are more of a visual learner, here is a another great video to watch.

Crocheting is a great craft/skill to learn. I’ve spent countless hours making things for others over the years and it has always brought me great joy. It’s been fun to pass on to my daughters. It’s a timeless craft and the possibilities of what you can do with it are only limited by your own imagination.

Important Crochet Tip….Learn From My Mistakes!

One final tip that I learned about the hard way….. when you finish up with your yarn or end of your project…DO NOT just tie a knot and cut the end. My experience is that those type of ends do not last long term.

Nothing is more frustrating than working on a large project only for it come unraveled….this happened to me with my oldest daughter’s baby blanket. Now that blanket might have taken more abuse than some things…..

With my new method, my “baby’s”  baby blanket has no spots coming unraveled.….and that is 5 years of being dragged around and loved on. The true test of how well anything will stay nice has to be a toddler and pre-school child.

My youngest daughter’s crocheted blanket. Well loved. I used a cotton blend yarn to improve the odds that it would hold up to a growing baby.

I have found that by weaving in the ends with a darning hook, I’ve had remarkable success at keeping things from coming unraveled

Darning needles come in a variety of sizes also. Somehow, I have a whole collection of them, but any one of them is perfect. I just use the first one I can reach out of my jar of crochet hooks and darning needles. Nothing scientific to my method!

I usually leave a 6-10 inch tail that I weave in. Maybe that’s a bit excessive, but I don’t like going to so much work and it coming out. My only exception is if it’s a tiny little flower or something small that won’t be taking hours of abuse from a kid.

Happy Crocheting!

Filed Under: Crochet Tagged With: beginner crochet, crochet, crochet basics, learn to crochet

Winter is Here!

February 10, 2018 by Betsiebop

Winter. It’s full of possibilities isn’t it? I am, personally, freezing cold half of the time. That’s just me. The rest of my family can all feel just fine in our house, and I will be bundled up from head to toe in wool and fleece.

Cici will be walking around with bare arms and legs and I am sure it makes me colder to just look at her. It reminds me so much of when I was a kid and never cold. Our family joke was, “Go put a sweater on, your mom is cold!” I totally get it now.

My kids aren’t cold, but I am and I just want to go around putting sweaters, socks and hats on them and they are forever taking it all off piece by piece as….they simply are NOT cold. What a thought!

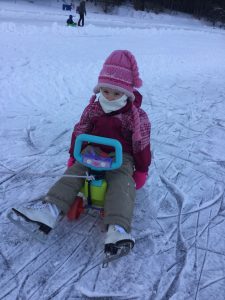
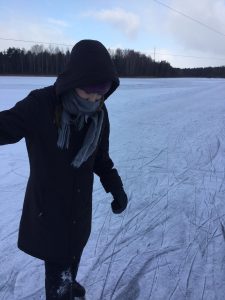
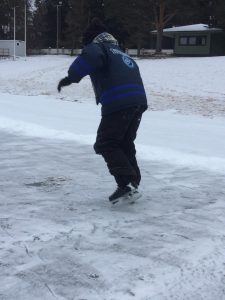
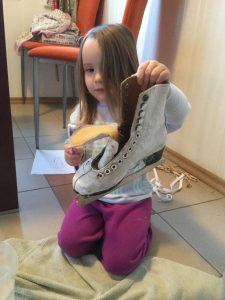
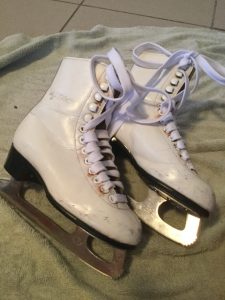
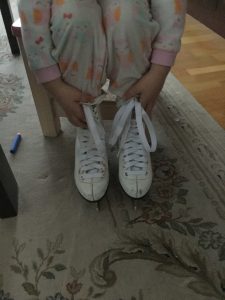
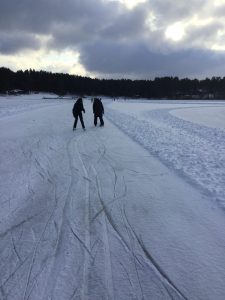
It always takes great effort for me to drag myself outside with the kids in wintertime. I always have so much fun when I do though. Then I wonder why do I resist this so much. This past week our weather has been perfectly chilly and our local little Verevi Lake is frozen.

We saw other people were starting to go out on in. The ice fishermen seem to be the first to venture out there. I figure by the time I see the little snow plow, plowing lanes on the ice that it is for sure strong enough for us to be on. Seems logical, if it can hold a small plow, it can hold us.

I think it’d be really fun to get an ice drill one day and just see for myself how deep the ice is. That should make for a great thing to do with the kids. I guess I could take an ax and a ruler too or whatever it is that you use to measure ice thickness.

Anyhow, last Friday, I took the kids ice skating. Baxter has been asking me for forever if I will come and actually skate with them. He thought that I could fit into his old hockey skates. Yes. My kids are now big enough to pass things onto me. Having big kids is awesome.

The last time we went, I helped Willow skate with her new skates. Annnnnddd, she likes the idea of skating much better than the real deal. So this time, I knew better than to go to all the effort to lace her up in her skates.

I thought that we’ll just pull her on her sled around the lake. That too, was much better in theory than reality. It’s actually a lot of work to pull a kid around a lake while skating. We all took turns pulling her and we had a great time.

The kids raced each other at small portions of the track. We went all around the lake. The path just curves all over like a giant snake. It’s a lot of fun. As we were coming back around to the front of the lake, I found myself lining up to race Baxter to the end. (I don’t know how this happened….) Such a bad idea!

I felt mildly proud that he fell at the start and I didn’t. I had a serious lead on him (That Bible verse about pride leading to a fall….was not lost on me)….he caught up to me quickly though and next thing I knew I hit a really bumpy patch of lake ice and totally wiped out.

I got back up and got going again….and quickly wiped out yet again. Baxter wiped out at the same junky ice patch….but he managed to make it to the end. I however, am not as resilient as a 12 year old boy.

That hurt. After I finally hobbled to the dock to take my skates off, I told the kids from here on out, “your mother does not race on ice….your mother does not race on ice…..your mother does not race on ice” They just laughed at me. Maybe next time my good sense will kick in. Maybe my bruised up wrists will serve as a good reminder. Somehow, I doubt it!

Knowing me, the next go around, one of the kids will suggest we should race and tell me how this time it will be different and I’ll do it again. My life kind of feels like that book, “If You Give a Moose a Muffin”. Willow loves that book. I think we’ve all read it to her so many times we could tell it to her by heart.

I love how our little town embraces nature and has so many opportunities for you to enjoy just getting out, even in winter. Elva is a beautiful hidden gem in Estonia and I am glad that God brought us here.

Filed Under: Estonia

Crochet Hat and Scarf Pattern for American Girl Dolls made Simple

January 20, 2018 by Betsiebop

My girls love playing with their dolls. Half of the fun seems to come with being able to dress them up. We are in the middle of winter right now and I have been making hats for us and it seemed like the only logical progression here would be to make a doll hat too.

The finished hat and scarf in two different color schemes.

My daughter has a friend with a birthday coming up and she really wanted to give her something for it. So this is where we started on the hat and scarf idea. It was such fun that I thought that I could write a pattern for this and make it easy for anyone who is beginning to crochet.

I was also thinking how could I create this so that my daughters could do this on their own in the future. I know learning how to read a pattern was really hard for me at first. I wanted to make something fun that would allows my girls to learn from.

This is something they don’t really know much about just yet. I teach them a stitch and they do that on their own little creations which is a great place to start.

I could tell my daughters really loved the hat and scarf. But I know they get the most pleasure in making their own doll things, so my goal was to make this into a pattern they could repeat on their own if and when they wished.

With that in mind, I tried to keep it pretty simple. You can change up the final look by using different colors or combining colors. I have two different versions. One is solid colored and the other uses two shades of gray that give a nice effect. One has a smaller pom-pom and the other has a slightly larger one thanks to Willows’ insistence that is must be “bigger”. She is my pom-pom girl. Such a simple pleasure in life, I can happily oblige. So a bigger pom-pom it is and I think turned out quite cute.

Using different colors really can change up the final look.

My girls have an American Girl doll and an Our Generation doll. Both are 18″ dolls and are very similar in sizing so what fits one, pretty much will fit the other.

The hat and scarf fit the doll perfectly.

We have fun crocheting together, but they do like a bit of independence too in doing their own thing. I owe a debt to my own mother who seemed to treasure everything I made. I don’t remember her ever criticizing my work or telling me to do better. She just made it seem like I had created the best thing ever.

My mom is pretty amazing like that. She gave me room to grow without making me feel like I could never measure up to perfection. Which is a good thing, because if that was ever a goal for me…I’m pretty sure she’d still be waiting for that to happen. I’m simply not a perfectionist. That is not to say she didn’t teach the value of hard work, because we got plenty of that and I am forever thankful for those lessons. It has served me well.

I think if I could be half as good of a mother as my own mom has been then I will have done reasonably well. She is just that amazing! I’ve found now that I am a mother and have been long enough for any newness and novelty to wear off, it’s much harder to be amazing than I thought my mom made it look.

She gave me a hook and yarn any time I wanted, no strings attached. (ha ha, I see that pun too) I try to do the same for my girls. I help them as they ask for it. Both of my big girls know how to crochet on a basic level and enjoy the skill. It seems the more I pull out and do, the more they are inspired to pull out a hook and create something also.

If you are totally new to crocheting, this post on Crochet Basics would be good to read also.

Basic Supplies you will need:

Crochet hook: size G (sometimes labeled as G-6, or 4mm ~they are all the same actual size just with a different name. Like I explain things to my daughter, “sometimes I call you, Ciarra and sometimes I call you, Cici, but you didn’t change, you are still the same person”
Scissors
Yarn: I used yarn that is 50 grams/150 meters (If that means nothing to you, then you should know that it was just your very average acrylic yarn and the suggested hook size on the label was for 3-3.5 mm, but I used a 4 mm (Size G) hook. So slightly larger than recommended, but it’s what worked for me.
Darning needle (For years I never used one and simply used my hook to work the remaining yarn ends into my work and while this is effective, it is much easier to just use a darning needle. So if you don’t have one, don’t feel too worried about it, you can still make this hat and scarf)
Pom-pom maker: This is optional, if you want a pom-pom on the top of the hat. You can also make a lovely pop-pom without a pom-pom maker by just using your hands or some card stock. I only have one because my dear Mother-in-law gave me one. It’s been fun to have and Willow, in particular, loves to make pom-poms. I would highly recommend getting one if you do much with yarn. It’s been the gift that keeps on giving in our house!

This is the pom-pom maker I have. They come in different sizes. This is the smallest one I have.


Basic Stitches you will use:

Single crochet (sc)
Chain (ch)
Double crochet (dc)
Slip Stitch (sl st)
Single stitch with a minor variation. I’ve seen some places where it is called rib crochet and others where it is just called a variation that can be done with single or double crochet. So for our purposes it is only used on the brim of the hat and we’ll just call it a single stitch variation. For this pattern I’ll label it as (sc X) (Yeah, I might have just made that up, but I think for our purposes it’s going work great.)

*I have pictures and an explanation for how to do this stitch, if you can do a single crochet stitch, you can do this just as easy, so don’t let it hold you back from making this hat.

Crochet Hat Pattern for American Girl Dolls (and it’s super easy!)

The first thing you are going to do is the brim or ridge of the hat. Don’t look at all the pattern at one time. Just take it one step at a time. You can do this!

To make this really easy to read, I will spell it out clearly and also in parenthesis I will write the same directions exactly how you would find them written in a regular pattern. This should help you see how it works and get a feel for it. So don’t do the directions twice. Just know that for each step I am also showing you how it is in “pattern” language.

Step 1 Chain 5 stitches. (ch 5)

Step 2 Skip one stitch and single crochet into the next stitch. Single crochet into each of the remaining 3 stitches. (Skip first stitch, sc into next stitch. SC 3)

Here is the first row of single crochet along with the chain one to start the following row.

Step 3 Chain 1. Turn your work. This is where we are going to pull out that single crochet variation stitch and will now use it for the rest of the brim. You will single crochet one stitch into each of the 4 stitches you have. The variation is that instead of putting your hook through both loops that you normally would, you are only going to put your hook through the back loop this time. And this is true for whatever side you are doing, you always do the back loop and this is what will give it the ribbed effect, kind of like knitting. (Ch1. turn your work. ScX 4)

For this stitch it feels like you are going down the middle of the “braided looking part” and coming out the back side.

This is another picture of the variation stitch.

Step 4 Do the exact same thing you just did. Chain 1. Turn your work. Single chain variation 4.
(Ch1. turn your work. ScX 4) You will do this until you have a total of 36 rows.
*This means that after the completion of step 3, you will have completed 2 of the total rows needed and will need to do 34 more rows.

This is the brim of the hat. It’ll turn into a circle…just hold on a minute….

Step 5 Bring the two ends together making sure you don’t have any twists in it. Now you will need to “sew” the two ends together. We are going to do this by just using the slip stitch. So do 5 slip stitches across the end to secure it together. (bring the ends together and sl st 5 across the end)

Line up the ends together.

Here I am slip stitching the ends together.

*You’ve completed the brim!

Step 6 Turn your work so the seam you’ve just made is on the “inside“. You are now making the body of the hat. Chain 2 stitches. This counts as your first double crochet, by the way.

Chain 2 to start the body of your hat.

Now comes the fun part, you are going to double crochet into the ends of your single crochet work. You kind of just have to poke your hook in and get aggressive, because it’s not always as easy to see where you are supposed to stitch. But you can totally do this!I have found that basically you will put one double crochet into the end of each single crochet row.

You will do this a total of 35 times and then you will be right back to where you started.

Once back at the beginning you will just slip stitch to connect them.

Slip stitch to connect.

(ch2. dc35. Slip stitch to connect.)

Step 7  Now you are one to the easy part! You’ve made it this far, the rest is a breeze. Chain 2 stitches. Double crochet into each stitch which if you counted correctly it should be 35 stitches. Slip stitch them to connect.

If you find you did 36 or 34 stitches…don’t stress it, just keep going. The biggest thing is to keep it the same. One or two stitches either way isn’t going to ruin your work. Just try to keep it at the same number. I’m sure it’ll still fit the doll.

If, however, you are a complete perfectionist, pull out a few stitches or add some more in if it will make you feel better. This is supposed to be enjoyable…so if a few stitches will stand in the way, by all means back up and get that in or pulled out whatever the case may be. (*ch 2, dc 35. Sl st to connect*)

Step 8 Do the exact same thing you did in step 7 until you have a total of 10 double crocheted rows. This means that from the end of step 7 you need to crochet 8 more rows.

(repeat * to * for a total of 10 rows) Crochet patterns seem to love using the asterisk. It basically means somewhere earlier in the pattern they will note where a repetition will start with an asterisk and they will note where it will end with an asterisk. Look up at the end of step 7 and you will see how this is written. Sometimes it spans a much larger amount of pattern that will be repeated. Because this is a simple pattern the asterisks are much closer to begin with.

Step 9 Now you are at the top of the hat. Cut your yarn off of your work leaving approximately a 10 inch tail to work with. Pull this through your loop to finish off the stitching. (trim yarn leaving 10″ tail. pull through loop to fasten off)

Step 10 Put your darning needle on the tail of yarn and pull it through the tops of your double crochet stitches. You will pull this tight to close the top into a nice hat shape. Weave the ends into the underside of your hat and snip the excess. (using darning needle pull yarn through tops of dc. pull tight to form small circle. fasten off on underside of hat)

Using the darning needle to gather up the top of the hat.

Step 11 (Optional) Make a pom-pom and attach to top of your hat. I just leave two long strands on the ends of the pom-pom and use those to tie the pom-pom onto the hat.

Tying the pom-pom on the inside of the hat.

CROCHET SCARF PATTERN FOR AMERICAN GIRL DOLLS (AND IT’S SUPER EASY TOO!)

Step 1 Chain stitch 13 stitches. (ch 13)

Step 2 Skip the first 4 stitches, then double crochet into the 5th chain stitch. Chain stitch one. Double crochet into the second foundation chain away. Basically you are alternating with a chain stitch and double crochet going into every other chain stitch on the foundation chain. Do this until you come to the end.

{This is what it should look like after you start the row with the first double crochet, chain stitch, double crochet, chain stitch, double crochet, chain stitch, double crochet, chain stitch, double crochet in the last stitch. This is the end of row. You should have what looks like a total of 6 main posts.}

You can see here clearly how it has 6 posts and 5 open spaces between them.

(dc into 5th foundation ch stitch, *ch 1, dc into second foundation chain*. Repeat * to * this ends with a dc in final stitch )

Step 3 Chain 3. This counts as your first double crochet and as the first chain stitch in the pattern. Skip a stitch and put a double crochet stitch in. Chain 1. skip a stitch and put in a double crochet stitch. You see the pattern now? Same alternating idea we did in step 2.

It is easy to see where to put your double crochet stitches from here on out as they simple go into the double crochet stitches from the previous row. So you are building one on top of the other with a chain space between them.

Continue to do that to the end. Again you will have a total of 6 posts and 5 spaces in between them.

(ch3. * skip a space and dc. ch1 *. Repeat * to* 4 times. End with dc in final stitch)

Step 4 Do the same thing as in step 3 for a total of 39 rows. (Repeat Step 3, 37 more times.)

Step 5 You are pretty much done with the scarf, just snip off yarn leaving about a 4-5 inch tail. Pull it through your loop and fasten off. (fasten off)

Step 6 (Optional) I added a fringe to the ends of my scarf. To do this, I just wrapped the yarn around my fingers (spread out a bit). I put them in each of the 5 spaces in the end. I used 3 pieces for each space. So for each end of the scarf, I cut 15 strips of yarn. I just wrapped it around my hand and cut them in batches to speed it up a bit. I then separated them out into groups of three.

The completed hat and scarf.

For the Fringe:

-Cut a total of 30 strips of yarn around 5 inches long.

This is how I measure out and cut my fringe pieces.

-Use 3 strips at a time

-Fold those 3 in half.

-Put your crochet hook through one of the open spaces on the end and grab the halfway point of your folded over yarn. It loops on real easy.

This is the first corner I started to add the fringe to.

-Pull the yarn halfway through the hole and loop the other ends through it and pull it snug

Pulling the yarn tight.

-Repeat until all 5 holes on each end have been done.

I trimmed the ends when I had them done so they would be nice and even.

You have completed the scarf!

I had a lot of fun working on this project and have two happy girls with something new for their dolls. And the bonus is that if they want more hats in more colors, they can try it for themselves! I know they will love that. Well, at least Ciarra will. Willow still has a ways to go before she is ready to tackle making a hat and scarf!

For Crochet Basics click here.

Filed Under: Crochet, Crochet patterns

Cleaning Up Ice Skates

January 12, 2018 by Betsiebop

My kids love to ice skate. With our winters, that feel like they last forever, it gives them something fun to look forward to in the winter.

Willow with her new ice skates.

Honestly, our winters aren’t “that” cold compared to a lot of places. But we don’t experience the fluctuations that I remember as a kid growing up in Nebraska.

It might snow today and be fully sunny and pleasant tomorrow. That is not something we experience here. It’s just this constant cold and darkness that eats away half of your personality by February.

Once the sun sets in summer time you feel like you are saying good-bye to an old friend you won’t see until the next summer. This would be the same summer that is gone in a blink of an eye and poses no real threat of getting hot enough to break out into a sweat on most days. I only joke that I feel a heat stroke coming on because in actuality, I’m tired of needing a jacket in August.

That might be a tiny bit of an exaggeration, but that’s how it feels by the time you hit January. Despite how whiny that feels, I really love this place.

Last year was the first time we bought our big kids ice skates of their own. It was one of the best decisions we’ve ever made as parents. Willow was only two and didn’t seem remotely interested in skating. She loved sledding and that seemed enough for her last year.

Before we did anything at all to her skates.

This year, the girls had outgrown their ice skates, so we got them some new ones for Christmas. Willow was so taken with the ice skates and was so bummed to not have any.

At three now, she loves to do everything the big kids do. At the very least, she likes to at least have a chance to try what they are doing.

Adam and I were out on a bit of a date last weekend and were looking through a second hand store. As I was walking through the back of the store, I spied a little pair of ice skates. They seemed to be begging me to take a closer look. They were so cute. Little white figure skates.

They did seem like they would be just a speck too big, but as fast as kids grow at this stage I figured they would still work. I could always put an extra pair of socks on Willow if needed to make them work. They were only two euros, which made them an impossibly hard deal to turn down. In fact, I couldn’t turn them down. They were perfect!

They needed new shoe laces and a bit of a cleaning, but structurally they seemed great. Not that I’m any expert on ice skates or anything. I just learned this year that ice skate blades need to be sharpened from time to time. Who knew? I certainly didn’t.

The ice skates all ready to clean up.

Anyhow, I brought home the skates and it was so fun to see Willow’s excitement over them. She wanted to put them on right away so I helped her.

Sure enough, they are a little bit big, but not bad at all. The up side is….we should get at least two years out of them before she does indeed, outgrow them!

The whiteness of the skates seemed to be slightly yellowed. So I looked here in town for some white shoe polish. I couldn’t find any so I resorted to looking online for how to make my own. And while I didn’t learn how to make white shoe polish, I did find lots of options for cleaning up leather shoes.

Amazingly, these skates are made of real leather and are so cute. Did I say that already? What is it about little things that are so stinkin’ cute?

I gathered up a few supplies and Willow and I spread a bath towel out on the kitchen floor. She was pretty eager to help me.

Getting ready to work on her skates.

The things I decided to try out using were toothpaste and a toothbrush, and a basic school eraser. I had read both things are good for helping to clean up scuffs and marks.

I tried the eraser and, honestly, it didn’t do a thing on the skates. It might work on a certain type of scuff mark, but it didn’t do anything on our little ice skates.

This did nothing for her little skates.

Our second attempt was with toothpaste and a toothbrush. We just used the cheap whitening toothpaste from our local grocery store, nothing fancy!

Just your ordinary toothpaste.

Putting toothpaste on an ice skate is really a three olds version of fun. She LOVED it. I gave her a toothbrush and let her scrub away at one skate while I worked on the second one. It did really seems to clean them up and get a lot of grime off of them.

All ready to scrub!

We did remove the shoe laces first. It really makes it much easier to get the tongue cleaned and saves you from getting toothpaste on the laces. Which is not what you want to do.

It is a messy venture to say the least. I had toothpaste all over my skirt by the time I was done and Willow had it all over her too. At the end I just used a damp rag to wipe off all the toothpaste and grime. I had to rinse it out and do that a couple of times to get it all off. But it did come off just fine.

I was a little disappointed that it didn’t really remove the little rusty spots from the shoe lace rivets. And the worn away areas would still be improved by actual show polish.

I’m sure if I went searching in Tartu I would find somewhere that actually sells a white shoe polish. I’m not sure, if or when I will ever get around to that.

The last thing we did was to slather lanolin all over the skates to add back in some moisture that we undoubtedly took out with our toothpaste scrub. Plus, I was hoping it would help to act as a bit of a barrier against water in the future.

Lanolin is awesome! Who knew there were so many uses for it?

Ever since I’ve had kids, which is most of my married life, I’ve had a tube of lanolin around. That stuff is awesome. It works on anything and everything. I could speak of it’s virtues forever. But this would definitely be a first time I’ve ever used it on shoes of any sort. It seemed to work pretty good though.

I grew up watching my dad polish up his cowboy boots over the years so I gave these ice skates my best buffing and shine I could. I think my dad would be proud!

The final product. So a bit better, but obviously no mistaking they have a story to tell about where they’ve been.

They look much better. I am not sure the pictures really do it justice. No, you won’t mistake these for brand-new skates off of someone’s shelf, but they look pretty nice. And I have one very happy little girl who is constantly trying on her “new” skates and trying to walk on the rug around the coffee table and asking when we’ll have real ice to skate on which, from the looks of it, will be very soon.

The happy girl trying her skates on!

Filed Under: DIY, Home

Crocheting and Knitting Hats

January 6, 2018 by Betsiebop

I have been drooling over this one particular hat online for at least a year now. But since I live in Estonia and shipping anything here seems to be a bit pricey, I’ve never bought it. I think it is so adorable though. I am always cold and since it seems about three-fourths of our year feels like winter having a hat that you love seems completely reasonable. At least to me, it seems completely reasonable.

The hat I am in love with.

I’ve texted a picture of it to my husband at least once…kinda hoping that the not-so-subtle hint would hit him, that I really needed the hat. This was over a year ago. It didn’t work. I doubt he even remembers it.

Last winter it occurred to me that since I love to crochet and dabble in knitting occasionally, I should just try making it myself. I made a hat, alright, but it really doesn’t look much like my “beloved hat”. It is what I have worn though, for the past winter.

The hat I made. Cici was only too happy to wear it for me to snap a quick picture.

Around this Christmas time when we started talking about gifts for the kids that my husband, Adam, asked me what did I want….it set me off on thinking what would I want if I could get something? We keep things pretty simple around here, so new things are not frequent happenings. I remembered my “beloved hat” and showed it to him again. But this time in my searching I found that the lady sells a pattern to it. It’s a knitting pattern, but I thought why not? Just because I’m not, particularly, a great knitter shouldn’t stop me from trying.

He didn’t seem that impressed with my find. But that usually means he’ll find something ten times as cool as I ever did to begin with. He’s pretty awesome like that.

Oh well. I could always try my hand at making my own again this year. If I try long enough, maybe, eventually, I will stumble onto something that resembles my hat. I decided to attempt for Willow. It turned out a little too big for her, so it turned into a present for Cici.

Getting closer and I even knitted this one.

Then on Christmas morning as we were opening our presents he pulls out something from under the tree and smiles real big. He wanted me to open this one right away! He had gotten me my pattern and had it all printed off and ready for me. I was so happy. What a fun surprise!

The super awesome hat pattern.

He got me several balls of yarn too. I love the colors. He always finds me the coolest and prettiest yarns. That is true love! He knows me well.

Look at this pretty yarn. I love the colors.

There is a little yarn store here in town that has the neatest selection of yarns that I love taking my girls to. We can always find something good and she has nice prices too. I’ve found that one of the blessings of living in Estonia is that we can find yarn in almost any grocery store too. It’s right up there with bread and milk, right? And if you happen to need a new crochet hook or knitting needle…they are there too in the grocery store, even in our small town store. Maybe all grocery stores have this feature. I don’t know.

Right away, I started on my new hat. I didn’t exactly have the right size of knitting needles, but I didn’t think that would be too big of a deal….I just added a few extra stitches to accommodate the size difference. That should work, right? I had to look up all those pesky abbreviations for knitting since I don’t know hardly a one of them.

My pattern was thoroughly marked up and I had barely begun. It was exciting. I worked on it for a couple of days and finally got it finished. It was a thing of beauty. It was perfect. Sort of. It just happened to also be way to big. I think it might fit a lady Goliath, but certainly not me. Talk about bummed.

Back to those stitches I added and the wrong sized needles….apparently, all those details really matter in knitting. Oops. I know they say to do a little swatch and count your stitches per inch and all that stuff, but it all seems so pointless and mindless to make a patch that makes nothing, but something to count. I can’t ever bring myself to do it. Maybe I should.

I don’t think making an entire hat that can’t be worn is entirely useful either. So maybe I should just count my losses next time and make the crazy stitch counting patch. I doubt I will though.

I’ve been thinking that there has to be a math formula to account for this. I just can’t seem to figure it out. I’m working with Jaz in Algebra right now so it has me thinking there has to be a way to figure this out without actually knitting or crocheting up a little piece.

Yarn comes in balls measured in length and weight. It seems that if the pattern calls for a 100gram ball, 116 meters long and what I have is a 100 gram ball, 210 meters long and the pattern says to cast on 68 stitches onto a 6mm knitting needle and I only have a 4mm knitting needle that there has to be a mathematical formula out there somewhere that says…cast on “x” amount of stitches on your 4 mm needle.

I’m pretty sure of it. I attempted a couple things. Nothing worked. I’m not a mathematical genius so maybe the answer is really simple and staring me in the face and I’m just missing it. If someone could solve this, I’m sure they would have my undying love forever. Maybe other people really like stitching up tiny squares to measure inches and stitches and calculate accordingly. I certainly do not.

So that hat….I hated to lose a whole ball of yarn over something that will not fit anybod I know. It’s pretty sad to make something that won’t fit anybody at all.  Heads just don’t come that big. I couldn’t even give it away! So I redeemed my ball my taking out every last one of my precious stitches. My kids couldn’t believe I would undo all that work. I guess, it was a good lesson for the whole family. Math matters. Or follow your pattern to a “T”, or “eat your vegetables”…I guess you could take from it what you want. Though I hardly doubt they thought that much beyond, “mom is crazy”.

Now, I am on round two and this time I am going back to crochet. I know crochet. I love crochet. My crochet hooks are my friends. I haven’t named them yet, but I might one day. I have taken the pattern and am doing pretty much the same thing, just in a crochet stitch. It’s looking pretty good so far.

I have high hopes for it actually turning out well. I have learned a lot from my pattern and still love it. And once I get the right sized knitting needles, I’m going to do it again. Because having more than one hat that you love, is okay too. I have total respect though for the prices some people have on Etsy for their hand made hats and such. I’ve decided that if you make something by hand you can charge what you want for it. Not that anyone out there has been begging me for my opinion to begin with. But there you have it!

If you want to know more about the crochet basics click here.

Filed Under: Crochet

Crocheting School….The book that changed my crochet life!

December 28, 2017 by Betsiebop

I love to crochet, but one thing that held me back from creating more things was a lack of knowing all the crochet “lingo” out there. My mom taught me the basics as a kid and I played around with all sorts of creative ideas.

In general, I just crocheted, “my own way”. I would see something I thought was cute and try to figure out how to replicate that with my own set of skills. I made blankets and pot holders and all sorts of little things.

It wasn’t until after the birth of my second kiddo, I finally realized that “lingo” and “patterns” could actually be my friend, and not the enemy. Shocking thought. Probably, none would be more shocked than my mother at this turn of events.

She so very patiently taught me all she knew about crocheting and probably more than I paid attention to. Why do we think we know more than we really do as kids?

If you want to learn about Crochet Basics click here.

A few months later when my son was only a couple months old and sick in the hospital near Christmas time my husband suggested that we at least do something for Christmas. We had a healthy little toddler who still needed parents and we needed each other.

So we took off just a little bit of time from the hospital and went to the bookstore and we each got a book. I don’t remember what my husband got, but we got an Aesop book for our little girl and I got a book on crocheting, fittingly called Crocheting School.

Our little guy, Baxter, did recover and we brought him home Christmas Eve day. He was still a sick little fella and it was the most pitiful holiday ever, but we were so thankful the Lord had allowed us the outcome he did.

Fast forward a bit, as that twelve years ago, that book on crochet has revolutionized my world. Or at least my crochet world. It was pretty cool to learn the names to stitches that I knew and to also learn completely new stitches. It totally opened up the world of reading patterns and what I could now really attempt to do. It has been so much fun.

I know that is a serious rabbit trail of how I got a book and I could talk for hours about my son and how he survived botulism and has done so well. You’d never know what a sick little boy he once was by looking at him now.

I can’t even think of my book without thinking of that time in my life when it seemed really bleak and we knew God had a plan, but we certainly didn’t know what it was going to be. We trusted him anyway and now this crochet book is just a small reminder of how He brings us through hard times. It’s like the gift that keeps on giving!

Going out with my husband was just a little window of brightness in an otherwise very dark time.

Now on to how awesome this book really is! For a reluctant pattern learner this book is awesome, as it has lots of pictures and clear instructions lined up with the names and abbreviations of the stitches.

There are simply tons of pictures. It made it super simple for someone like me who would rather have a grandma teach me, than to ever crack open a book and try to learn all on my own. But this book totally worked for me.

It is one that I pull out over and over again to refresh my mind on a particular stitch or when I am trying a new pattern and it mentions some stitch I don’t have a clue about or haven’t used in a long time.

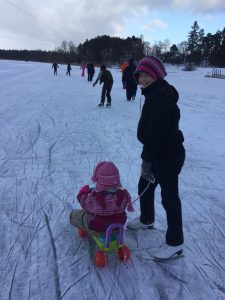
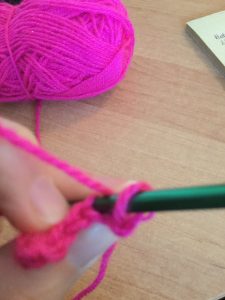
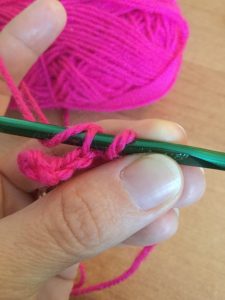
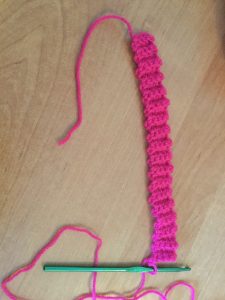
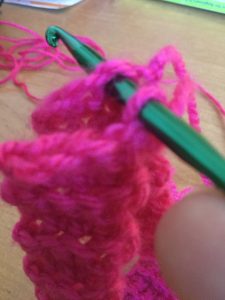
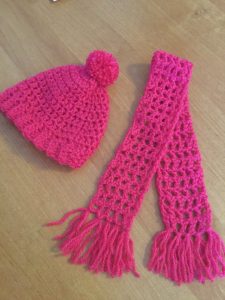
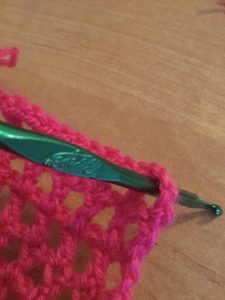
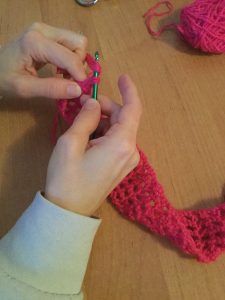
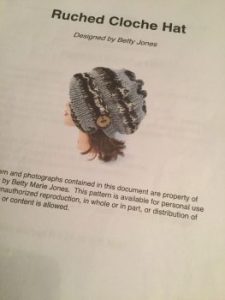
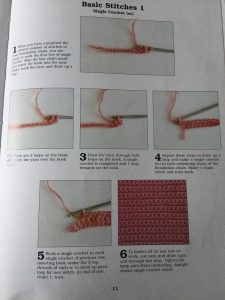
Where this book really shined a light in my crochet life was that it started with the very basics. It gave the common name for the stitch right along with its’ abbreviation. Knowing the abbreviations is key to reading a pattern.

Those patterns can look mighty daunting until you get the hang of the abbreviations and then they aren’t so bad after all. It also breaks the stitches down into several steps with really clear pictures. The pictures were the superstar, in my opinion, for deciphering how to “really” figure the stitches out.

Thankfully, it came with a hard cover and has survived my house all these years. It has been my best crochet friend ever. I mean, if you could have a crochet friend, then this Crocheting School book is definitely it. This friend takes me as I am. And that is no perfectionist!

I am forever having to modify something because I didn’t count stitches or some other short cut that sounded really great in my head and didn’t work out so well in reality. But I’d like to think it makes me a better crocheter as it helps me find creative strategies to all sorts of things that end up teaching me great new skills.

I can salvage about anything these days and it still turn out reasonably decent.

I still love to make blankets and have made one for each of my babies. All four of them. Two of my kids, in particular, have totally loved them. A third blanket is lost to our time in Africa. And the fourth one is my son’s and I suppose he is somewhat ambivalent about it. The before and after of my oldest daughter’s blanket is crazy. It started out so cute and pretty.

I had learned the stitch which I have long forgotten the name, but think it was something in the shell stitch family, from a coworker on the night shift I worked with during my time as a graduate nurse…those fun days of working while studying for the NCLEX.

The lady was awesome and I was so excited to practice my new stitch that I made the hugest blanket ever or at least started on the hugest blanket ever. It was in this time that I also got engaged so it got set aside for a small while. Then we got married and got pregnant right away which led me right back to that blanket.

My husband often called it a car cover since it was so stinkin’ huge. I kept going and had to buy more and more yarn. I think each time I said to him that I needed some more yarn…I got the look of “when will this ever end” or maybe it was “I’m gonna need a small saving account for my wife’s yarn habit”.

I don’t know which, but he humored me and off we’d go to get more yarn. We were still in the newly wed state where buying yarn together still felt exciting. Or maybe that was just me? Anyhow, I ended up folding the “car cover” baby blanket over into two and stitching it together.

My daughter has loved that thing to literal shreds. It looks positively horrible in a beautiful, yet lovely sort of way and it’s hard to believe what it once looked like.

I have since taught that same daughter, Jaz, to crochet and now she crochets things for me. I am wearing right now the beautiful scarf she made me for my birthday. And my second daughter, Cici, is picking it up real well too. She likes to make things for her dolls.

And my youngest, Willow, often wants to join in on the fun…so I let her pull out a crochet hook along with a ball of yarn and I help her crochet. It’s pretty rough going, to be honest. She sees the rest of us pulling yarn through a hook and it seems so easy and it just isn’t that easy for her yet. So she doesn’t last long, but it’s cute to see her try. I bet with her persistence she’ll get it one day.

For more tips on Basic Crocheting click here.

Filed Under: Crochet

Recent Posts

  • Handlettering – My favorite New Hobby
  • How To Make Chicken Broth
  • Make a Summer Schedule for Kids
  • Corner To Corner Crochet
  • What Do You Need To Start Crocheting – Crochet Basics

Categories

  • Crochet
  • Crochet patterns
  • DIY
  • Estonia
  • hand lettering
  • Home
  • kitchen
  • Organization
  • recipes

Copyright © 2023 · Minimum Pro Theme on Genesis Framework · WordPress · Log in