My girls love playing with their dolls. Half of the fun seems to come with being able to dress them up. We are in the middle of winter right now and I have been making hats for us and it seemed like the only logical progression here would be to make a doll hat too.
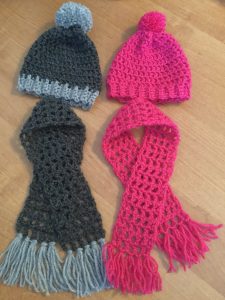
The finished hat and scarf in two different color schemes.
My daughter has a friend with a birthday coming up and she really wanted to give her something for it. So this is where we started on the hat and scarf idea. It was such fun that I thought that I could write a pattern for this and make it easy for anyone who is beginning to crochet.
I was also thinking how could I create this so that my daughters could do this on their own in the future. I know learning how to read a pattern was really hard for me at first. I wanted to make something fun that would allows my girls to learn from.
This is something they don’t really know much about just yet. I teach them a stitch and they do that on their own little creations which is a great place to start.
I could tell my daughters really loved the hat and scarf. But I know they get the most pleasure in making their own doll things, so my goal was to make this into a pattern they could repeat on their own if and when they wished.
With that in mind, I tried to keep it pretty simple. You can change up the final look by using different colors or combining colors. I have two different versions. One is solid colored and the other uses two shades of gray that give a nice effect. One has a smaller pom-pom and the other has a slightly larger one thanks to Willows’ insistence that is must be “bigger”. She is my pom-pom girl. Such a simple pleasure in life, I can happily oblige. So a bigger pom-pom it is and I think turned out quite cute.
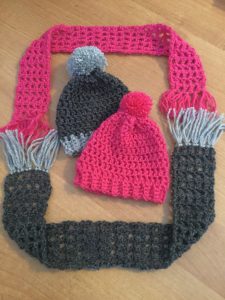
Using different colors really can change up the final look.
My girls have an American Girl doll and an Our Generation doll. Both are 18″ dolls and are very similar in sizing so what fits one, pretty much will fit the other.
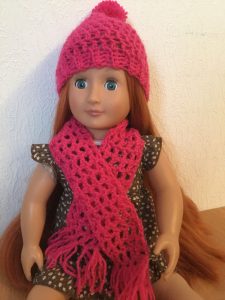
The hat and scarf fit the doll perfectly.
We have fun crocheting together, but they do like a bit of independence too in doing their own thing. I owe a debt to my own mother who seemed to treasure everything I made. I don’t remember her ever criticizing my work or telling me to do better. She just made it seem like I had created the best thing ever.
My mom is pretty amazing like that. She gave me room to grow without making me feel like I could never measure up to perfection. Which is a good thing, because if that was ever a goal for me…I’m pretty sure she’d still be waiting for that to happen. I’m simply not a perfectionist. That is not to say she didn’t teach the value of hard work, because we got plenty of that and I am forever thankful for those lessons. It has served me well.
I think if I could be half as good of a mother as my own mom has been then I will have done reasonably well. She is just that amazing! I’ve found now that I am a mother and have been long enough for any newness and novelty to wear off, it’s much harder to be amazing than I thought my mom made it look.
She gave me a hook and yarn any time I wanted, no strings attached. (ha ha, I see that pun too) I try to do the same for my girls. I help them as they ask for it. Both of my big girls know how to crochet on a basic level and enjoy the skill. It seems the more I pull out and do, the more they are inspired to pull out a hook and create something also.
If you are totally new to crocheting, this post on Crochet Basics would be good to read also.
Basic Supplies you will need: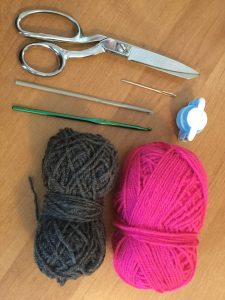
Crochet hook: size G (sometimes labeled as G-6, or 4mm ~they are all the same actual size just with a different name. Like I explain things to my daughter, “sometimes I call you, Ciarra and sometimes I call you, Cici, but you didn’t change, you are still the same person”
Scissors
Yarn: I used yarn that is 50 grams/150 meters (If that means nothing to you, then you should know that it was just your very average acrylic yarn and the suggested hook size on the label was for 3-3.5 mm, but I used a 4 mm (Size G) hook. So slightly larger than recommended, but it’s what worked for me.
Darning needle (For years I never used one and simply used my hook to work the remaining yarn ends into my work and while this is effective, it is much easier to just use a darning needle. So if you don’t have one, don’t feel too worried about it, you can still make this hat and scarf)
Pom-pom maker: This is optional, if you want a pom-pom on the top of the hat. You can also make a lovely pop-pom without a pom-pom maker by just using your hands or some card stock. I only have one because my dear Mother-in-law gave me one. It’s been fun to have and Willow, in particular, loves to make pom-poms. I would highly recommend getting one if you do much with yarn. It’s been the gift that keeps on giving in our house!
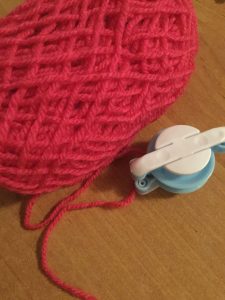
This is the pom-pom maker I have. They come in different sizes. This is the smallest one I have.
Basic Stitches you will use:
Single crochet (sc)
Chain (ch)
Double crochet (dc)
Slip Stitch (sl st)
Single stitch with a minor variation. I’ve seen some places where it is called rib crochet and others where it is just called a variation that can be done with single or double crochet. So for our purposes it is only used on the brim of the hat and we’ll just call it a single stitch variation. For this pattern I’ll label it as (sc X) (Yeah, I might have just made that up, but I think for our purposes it’s going work great.)
*I have pictures and an explanation for how to do this stitch, if you can do a single crochet stitch, you can do this just as easy, so don’t let it hold you back from making this hat.
Crochet Hat Pattern for American Girl Dolls (and it’s super easy!)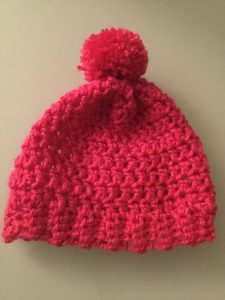
The first thing you are going to do is the brim or ridge of the hat. Don’t look at all the pattern at one time. Just take it one step at a time. You can do this!
To make this really easy to read, I will spell it out clearly and also in parenthesis I will write the same directions exactly how you would find them written in a regular pattern. This should help you see how it works and get a feel for it. So don’t do the directions twice. Just know that for each step I am also showing you how it is in “pattern” language.
Step 1 Chain 5 stitches. (ch 5)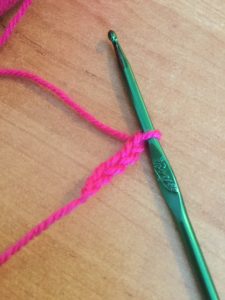
Step 2 Skip one stitch and single crochet into the next stitch. Single crochet into each of the remaining 3 stitches. (Skip first stitch, sc into next stitch. SC 3)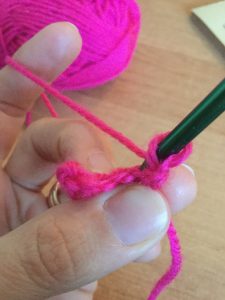
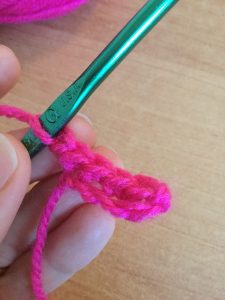
Here is the first row of single crochet along with the chain one to start the following row.
Step 3 Chain 1. Turn your work. This is where we are going to pull out that single crochet variation stitch and will now use it for the rest of the brim. You will single crochet one stitch into each of the 4 stitches you have. The variation is that instead of putting your hook through both loops that you normally would, you are only going to put your hook through the back loop this time. And this is true for whatever side you are doing, you always do the back loop and this is what will give it the ribbed effect, kind of like knitting. (Ch1. turn your work. ScX 4)
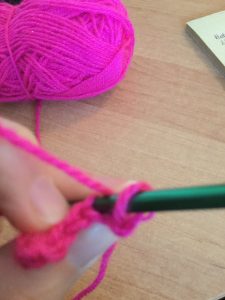
For this stitch it feels like you are going down the middle of the “braided looking part” and coming out the back side.
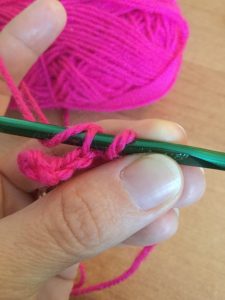
This is another picture of the variation stitch.
Step 4 Do the exact same thing you just did. Chain 1. Turn your work. Single chain variation 4.
(Ch1. turn your work. ScX 4) You will do this until you have a total of 36 rows.
*This means that after the completion of step 3, you will have completed 2 of the total rows needed and will need to do 34 more rows.
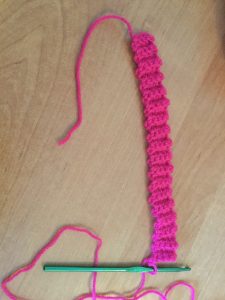
This is the brim of the hat. It’ll turn into a circle…just hold on a minute….
Step 5 Bring the two ends together making sure you don’t have any twists in it. Now you will need to “sew” the two ends together. We are going to do this by just using the slip stitch. So do 5 slip stitches across the end to secure it together. (bring the ends together and sl st 5 across the end)
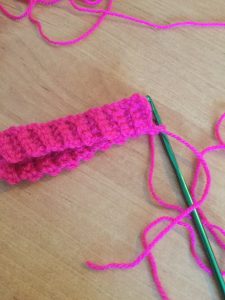
Line up the ends together.
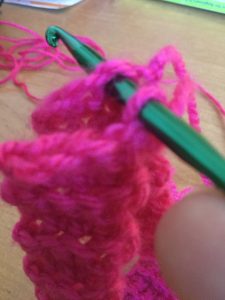
Here I am slip stitching the ends together.
*You’ve completed the brim!
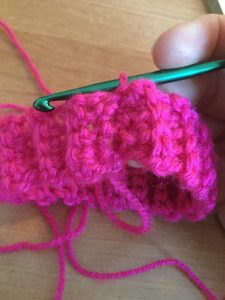
Step 6 Turn your work so the seam you’ve just made is on the “inside“. You are now making the body of the hat. Chain 2 stitches. This counts as your first double crochet, by the way.
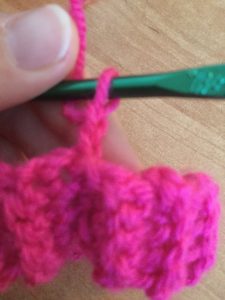
Chain 2 to start the body of your hat.
Now comes the fun part, you are going to double crochet into the ends of your single crochet work. You kind of just have to poke your hook in and get aggressive, because it’s not always as easy to see where you are supposed to stitch. But you can totally do this!I have found that basically you will put one double crochet into the end of each single crochet row.
You will do this a total of 35 times and then you will be right back to where you started.
Once back at the beginning you will just slip stitch to connect them.
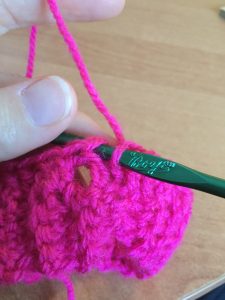
Slip stitch to connect.
(ch2. dc35. Slip stitch to connect.)
Step 7 Now you are one to the easy part! You’ve made it this far, the rest is a breeze. Chain 2 stitches. Double crochet into each stitch which if you counted correctly it should be 35 stitches. Slip stitch them to connect.
If you find you did 36 or 34 stitches…don’t stress it, just keep going. The biggest thing is to keep it the same. One or two stitches either way isn’t going to ruin your work. Just try to keep it at the same number. I’m sure it’ll still fit the doll.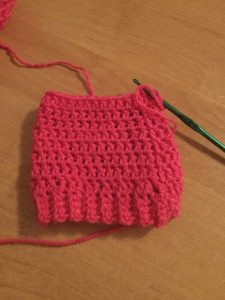
If, however, you are a complete perfectionist, pull out a few stitches or add some more in if it will make you feel better. This is supposed to be enjoyable…so if a few stitches will stand in the way, by all means back up and get that in or pulled out whatever the case may be. (*ch 2, dc 35. Sl st to connect*)
Step 8 Do the exact same thing you did in step 7 until you have a total of 10 double crocheted rows. This means that from the end of step 7 you need to crochet 8 more rows.
(repeat * to * for a total of 10 rows) Crochet patterns seem to love using the asterisk. It basically means somewhere earlier in the pattern they will note where a repetition will start with an asterisk and they will note where it will end with an asterisk. Look up at the end of step 7 and you will see how this is written. Sometimes it spans a much larger amount of pattern that will be repeated. Because this is a simple pattern the asterisks are much closer to begin with.
Step 9 Now you are at the top of the hat. Cut your yarn off of your work leaving approximately a 10 inch tail to work with. Pull this through your loop to finish off the stitching. (trim yarn leaving 10″ tail. pull through loop to fasten off)
Step 10 Put your darning needle on the tail of yarn and pull it through the tops of your double crochet stitches. You will pull this tight to close the top into a nice hat shape. Weave the ends into the underside of your hat and snip the excess. (using darning needle pull yarn through tops of dc. pull tight to form small circle. fasten off on underside of hat)
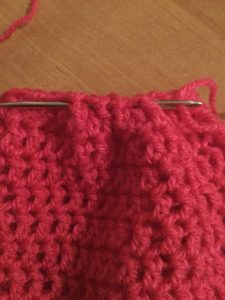
Using the darning needle to gather up the top of the hat.
Step 11 (Optional) Make a pom-pom and attach to top of your hat. I just leave two long strands on the ends of the pom-pom and use those to tie the pom-pom onto the hat.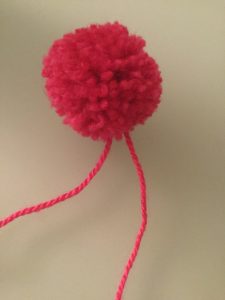
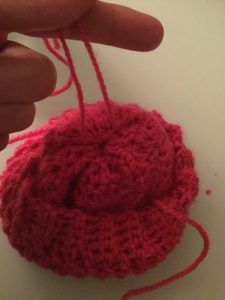
Tying the pom-pom on the inside of the hat.
CROCHET SCARF PATTERN FOR AMERICAN GIRL DOLLS (AND IT’S SUPER EASY TOO!)
Step 1 Chain stitch 13 stitches. (ch 13)
Step 2 Skip the first 4 stitches, then double crochet into the 5th chain stitch. Chain stitch one. Double crochet into the second foundation chain away. Basically you are alternating with a chain stitch and double crochet going into every other chain stitch on the foundation chain. Do this until you come to the end.
{This is what it should look like after you start the row with the first double crochet, chain stitch, double crochet, chain stitch, double crochet, chain stitch, double crochet, chain stitch, double crochet in the last stitch. This is the end of row. You should have what looks like a total of 6 main posts.}
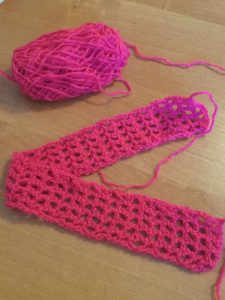
You can see here clearly how it has 6 posts and 5 open spaces between them.
(dc into 5th foundation ch stitch, *ch 1, dc into second foundation chain*. Repeat * to * this ends with a dc in final stitch )
Step 3 Chain 3. This counts as your first double crochet and as the first chain stitch in the pattern. Skip a stitch and put a double crochet stitch in. Chain 1. skip a stitch and put in a double crochet stitch. You see the pattern now? Same alternating idea we did in step 2.
It is easy to see where to put your double crochet stitches from here on out as they simple go into the double crochet stitches from the previous row. So you are building one on top of the other with a chain space between them.
Continue to do that to the end. Again you will have a total of 6 posts and 5 spaces in between them.
(ch3. * skip a space and dc. ch1 *. Repeat * to* 4 times. End with dc in final stitch)
Step 4 Do the same thing as in step 3 for a total of 39 rows. (Repeat Step 3, 37 more times.)
Step 5 You are pretty much done with the scarf, just snip off yarn leaving about a 4-5 inch tail. Pull it through your loop and fasten off. (fasten off)
Step 6 (Optional) I added a fringe to the ends of my scarf. To do this, I just wrapped the yarn around my fingers (spread out a bit). I put them in each of the 5 spaces in the end. I used 3 pieces for each space. So for each end of the scarf, I cut 15 strips of yarn. I just wrapped it around my hand and cut them in batches to speed it up a bit. I then separated them out into groups of three.
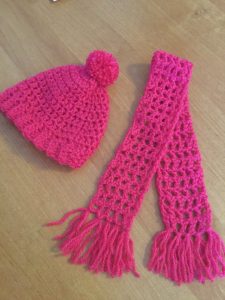
The completed hat and scarf.
For the Fringe:
-Cut a total of 30 strips of yarn around 5 inches long.
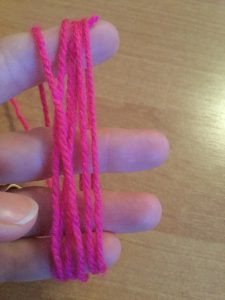
This is how I measure out and cut my fringe pieces.
-Use 3 strips at a time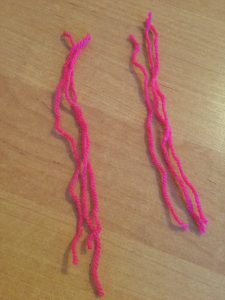
-Fold those 3 in half.
-Put your crochet hook through one of the open spaces on the end and grab the halfway point of your folded over yarn. It loops on real easy.
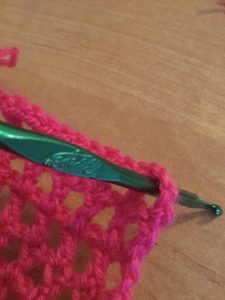
This is the first corner I started to add the fringe to.
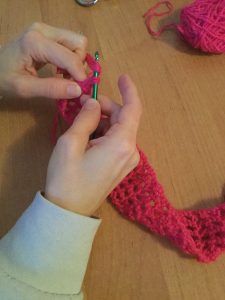
-Pull the yarn halfway through the hole and loop the other ends through it and pull it snug
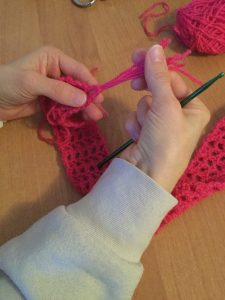
Pulling the yarn tight.
-Repeat until all 5 holes on each end have been done.
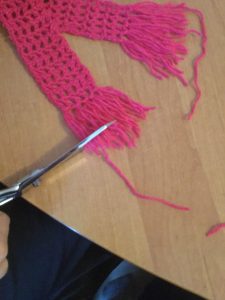
I trimmed the ends when I had them done so they would be nice and even.
You have completed the scarf!
I had a lot of fun working on this project and have two happy girls with something new for their dolls. And the bonus is that if they want more hats in more colors, they can try it for themselves! I know they will love that. Well, at least Ciarra will. Willow still has a ways to go before she is ready to tackle making a hat and scarf!
For Crochet Basics click here.